 |
Cassy's "3 in 1" Dresses |
|
|
Cassy's "3 in 1" Dresses |
|
Preamble
I decided to give another attempt to making Cassy tailored garb. But this time, I wanted to do it much differently.
MUCH differently.
 The first thing I had found from my previous tries, was that Cassy grew faster than I could make tailored garb. So, I needed garb that would grow with her. A search on the web had a few choices, but nothing that would really be "tailored".
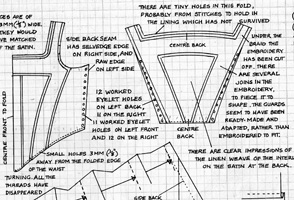
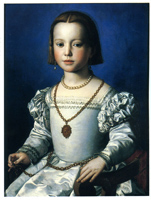
However, I had recently become obsessed with the Elenora di Toledo portrait, and was fascinated by the burial pattern in Patterns of Fashion: 1560-1620. I took a look at the bodice pattern and realized, with a bit of modification Cassy would have a pattern that would grow with her.
The first thing I had found from my previous tries, was that Cassy grew faster than I could make tailored garb. So, I needed garb that would grow with her. A search on the web had a few choices, but nothing that would really be "tailored".
However, I had recently become obsessed with the Elenora di Toledo portrait, and was fascinated by the burial pattern in Patterns of Fashion: 1560-1620. I took a look at the bodice pattern and realized, with a bit of modification Cassy would have a pattern that would grow with her.
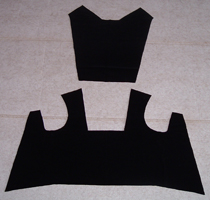
I first took Cassy's measurements and created a block pattern based on the male body block found in The Costume Technicians Handbook. I then cut down the pattern around the neck to make a square neck, and moved the side seam around to the back as seen in the burial pattern. On the back piece, I added 1" on each side to the bust measurement, and 2" on each side of the waist measurement. I figured that that should last her until puberty.
I made a quick mock of the pattern and tried it on Cassy, and it fit like a dream. The waist was even in the right place. I knew this was going to work. The next step was to make a winning sleeve pattern, so I dug out the mock sleeves from the Gender Neutral Outfit and put them on Cassy. The armhole was still perfect, but the length needed some work. I also figured that I would need to add some width, as I didn't need her outgrowing the sleeves too early. I added 2" of length to the sleeve, 1" above the elbow, and 1" below. I also added 1" to the width overall, and resmoothed the armseye curve by eyeball. The result is a very nice basic sleeve pattern that will work with the dress.
I still had to figure out the skirts. The di Toledo pattern called for shaped skirts, but since I wanted to put in a deep hem to allow for height growth, I felt that a curved hem would be more problems than it was worth. So, I decided a straight panel skirt would be best.
Now having all the pattern pieces ready to go, I needed to find material. I thought it would be nice for Cassy to have more than one dress, so I went looking in my stash for some suitable materials. I found some black velveteen that would work for court garb, some tan coarse linen for colder days, and some leftover thin linen from Morgan's Doublet project. I was excited! 3 outfits that would fit her!
After cutting out the panels for the other skirts, (2 for the front, 1 for the back) I started sewing. Unfortunately, I couldn't sew the black dress, so I put it aside to wait for it's dyed lining.
I unfortunately did not take pics of the tan dress, but I did with the light blue dress, as it would be easier to show the demonstrations.
Chapter 1
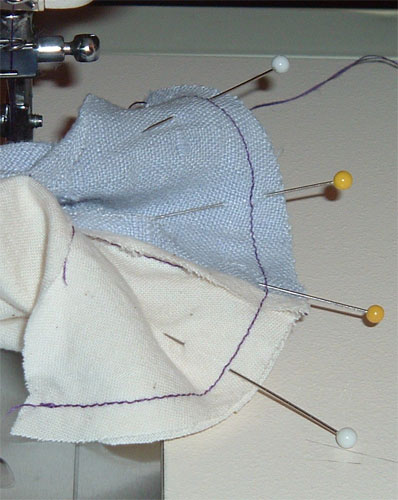
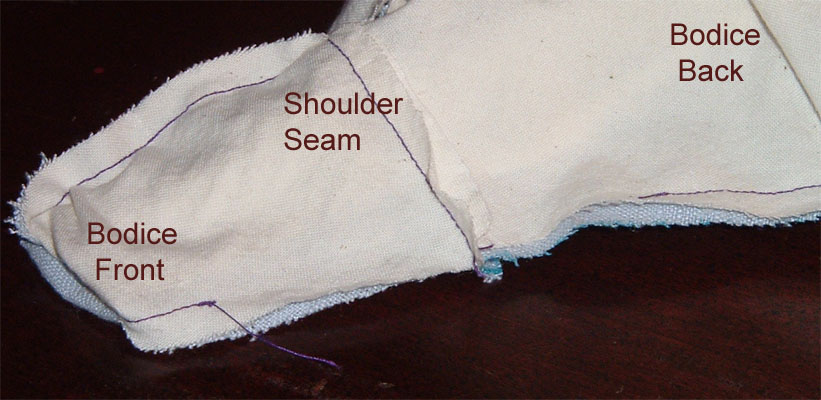
Remember how I didn't sew the shoulders for 2" on either side of the side seams? Well, now I was going to sew all that up. First, I put the right sides of the shoulder seam front and back together and pinned it in place. Then, I pinned the lining together, right sides together. I ran it through the sewing machine, made the shoulder lay flat, and ended up with a flush shoulder seam with an unsewn gap on the armseye.
I then pulled the back bodice piece through the front bodice piece until it exposed the unsewn seam. I pushed the bulky fabric to one side, and pinned the unsewn seam together. It was simple to sew the seam together, and the pull the bodice back right side out. The result: a nice, flush shoulder seam, completely internal. No handsewing required.
I repeated the same procedure on the other shoulder seam.
All that was now left to do, was to dye the finished product. I bought 3 tins of Dylon Cold dye, and threw it in my washing machine along with the unbleached lining for the black velveteen dress, and agitated on the hottest setting for 4 hours. Periodically, I added a pot of boiling water, and at one point, 1.2 cup of salt and 2 packets of dylon fix it. After letting the machine finish it's rinse and spin cycle, I hung the dress to dry in the shade outside. The result is a beautiful deep purple colour, light, airy, and awaiting decorating.
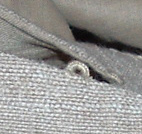
I've been adding silver lacing rings to the bodice back and to the sleeves. Soon it should be ready for wearing at this upcoming tourney season.
_
Chapter 2
_
Chapter 3
_
 I cut out all the materials for the bodices and sleeves in one night. I still had to contend with lining materials, so I stopped and made some decisions. I knew Cassy's favorite colour was not blue, so the light linen dress was going to have to be re-dyed. Since I had already cut out the bodice and sleeves for it, I felt that if I had tried to dye it then, I would have been working with distorted and frayed pieces. I had read in The Silk Industry of Renaissance Italy that dresses were frequently sent back to the dyers to be re-dyed when they started to fade, so I figured I could re-dye Cassy's light linen blue dress once it was completed, thereby avoiding problems with dying cut pieces.
I managed to find some thin linen in my stash that was tan in colour, so I used that for the lining for the coarse linen tan dress.
I had some unbleached cotton in my stash that I decided to use for the light linen blue dress, that way, when it was dyed, it would be all the right matching colour.
However, when it came to cutting the panels for the skirts, I found I did not have quite enough black velveteen.
Dress 1 -
Coarse Linen, Tan, with light linen lining, tan
Dress 2 -
Light linen, blue, with unbleached cotton, (over-dyed Purple)
Dress 3 -
Black velveteen trimmed in purple velveteen, with purple cotton lining.
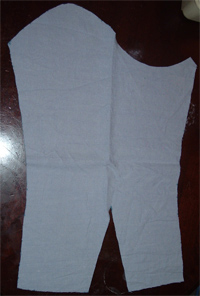
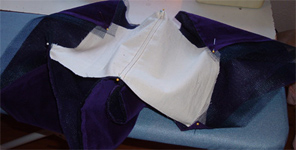
 To start, I needed to sew up the center back seam, as there was not enough material for me to cut it out as one piece. I pinned the 2 pieces to the lining so that I knew I had the angle lines matched up perfectly. I then folded the lining in half and sewed up the center seam. I chose to use purple thread for all the sewing, as that was going to be the colour of the dress when I was all done.
I then unpinned the linen from the lining and pressed the seam open. I also stitched the seam open, so that it would lay flat thru repeated washings, and would not fray. I then pinned the linen back onto the lining (right sides together), and sewed the neck seam. I also sewed the side seams, but only to about 2" from the shoulder seam.
To start, I needed to sew up the center back seam, as there was not enough material for me to cut it out as one piece. I pinned the 2 pieces to the lining so that I knew I had the angle lines matched up perfectly. I then folded the lining in half and sewed up the center seam. I chose to use purple thread for all the sewing, as that was going to be the colour of the dress when I was all done.
I then unpinned the linen from the lining and pressed the seam open. I also stitched the seam open, so that it would lay flat thru repeated washings, and would not fray. I then pinned the linen back onto the lining (right sides together), and sewed the neck seam. I also sewed the side seams, but only to about 2" from the shoulder seam.
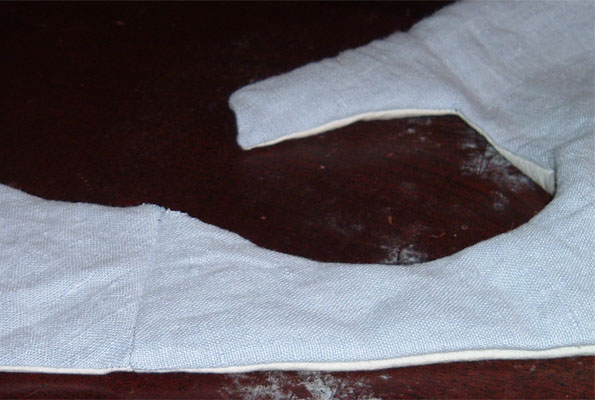
I then moved on to the bodice front, and proceeded to do the same thing. I pinned the linen to the lining, sewed around the square neck, sewed the side seams, and around the armseye to about 2" of the shoulder seam. It was necessary to clip the seams around the armseye and in the corners of the square neck, so that when it was turned right side out, it would lay flat. After turning both the front and back bodice pieces, I then had to sew them together at the shoulder seams.


 With the bodice done except for the waist line, I started on the sleeves. For purposes of growth, I decided to make the sleeves tie on. More movement room and removable for warmer days. I started with my cut out pattern, and sewed up the wrist to the elbow. Pressing the seam open, I stitched the open seam down so that I wouldn't have bulk issues. I then sewed the sleeve closed, and with difficulty, machine stitched the seam open. I next did the same thing to the sleeve lining, and turned it right side out. With right sides together, I sewed the lining to the linen sleeve, and clipped the curved seams. Turning right side out and pressing the sleeve head flat, I then tucked the wrist opening and sewed the lining to the linen by hand. It worked really well, and it was very simple to do the same thing to the other sleeve.
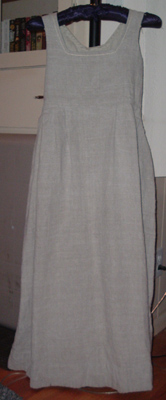
 The skirts were a very simple matter as they were just straight panels of fabric. As I was sewing the panels together, I realized, I was going to need some slits for the waist opening. I knew that I was going to have 2 panels for the front, and 1 for the back. I used the panels seamline to create the slits needed for attaching at the waist. After sewing the pressed panel seams down, I gathered the top of the panels and sewed them down to the bottom of the bodice, front and back. I left the front 5" unaltered so that when playing, Cassy would not trip over to many skirts in the front. I did not line the skirts, as I wanted this to be a cool dress to wear in the heat of the summer, and I can't see any loss of period look because of this decision. I finally sewed the bodice lining closed by hand. Now all that was left was to put the dress on Cassy, and mark the hem. I had made the panels 40" long so that as she grew taller, I could let it out. I pinned the dress on Cassy, even though I had no lacing in the back yet. I marked the skirt hem at the floor, and took it off her. I then folded the edge of the fabric up to the hem line and sewed it in place by hand. Then I folded the hem again, and sewed the new hemline in place.

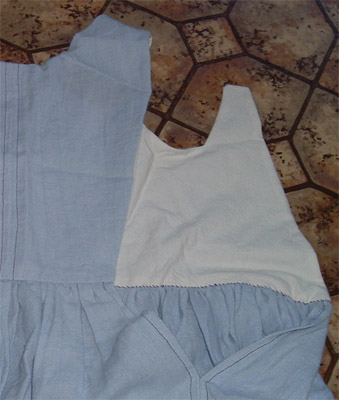
 Although the tan linen dress was made first, I did not document my progress, so I added this chapter to indicate what I did differently from the purple linen dress. First, I attached the bodice front and back differently. I turned both pattern pieces right side out and fed the bodice front strap through the bodice back strap, bringing the bodice back strap with it. The result was that I had 4 layers of fabric all aligned together that I just ran over the sewing machine with and pulled back round to the right side. It isn't as clean, but as I'd been taught that all my life, I didn't question it until the seam did not come out as flush and clean as I would have liked. It also resulted in the shoulder seams being bulky and difficult to sew decoration to. I ended up adding a cream handmade cord to the bodice around the square neck for some simple decoration, and it looked good.
 The longest and most time consuming part of this tan dress was the lacing holes. I used oatmeal coloured cotton embroidery floss in a free ladder stitch to make the holes, and reinforced them with a sound douching of fray check. Instead of gathering the skirt, I pleated it. Double pleats in the back, single pleats on the sides, and flat in front for play and movement. The sleeves had 3 single cords that tied into holes on the shoulder seam. If I had to do it differently, I would have double cords to tie into the shoulder holes. The singles tend to untie themselves too often. But, besides that, the dress has stood up to repeated washings, and a full tourney season already.
Yea me!
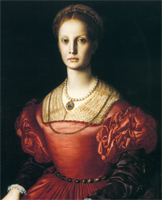
My biggest hurdle was the sleeves. I had no clue as to how I was going to create those puffs, but came across a website where the sleeves were recreated with tulle netting. Feeling that this would be a good idea, I purchased 6 meters of stiff tulle in black.
With the dye job finished, the lining material for the court gown was ready. After cutting out the bodice pieces, and treating them in the same manner as the light linen dress, I realized I did not have any sleeves. Cassy in the meantime had picked out a sleeve design from 1540's Florentine, which were very puffy short sleeves. I checked, and found I had just enough purple velvet to do the sleeves in purple.
 Using 3 meters per sleeve, I attached the tulle to the purple velvet. I then attached the reinforced velvet to a base cotton fabric in a basic sleeve shape. Using a long purple thread, I tacked down the velvet puff in a manner similar to the painting. I then used some of the dyed purple fabric to make a proper lining, thereby protecting the underside of all the hand stitches. I used some leftover purple velvet as bias binding at the top and bottom of the puffy sleeve, and some leftover black velvet scraps pieced together for the sleeve seam. Hindsight being 20/20, I would not have used a long thread to tack down the "puffs", but would have knotted each tack separately. The sleeves were tough to do, but looked good when completed.
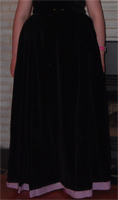 For the skirt, I made some changes from the other dresses. I decided to fully line it with dyed purple cotton for fun and because I had leftover dyed cotton. I also decided to go fancy, and cartridge pleat the skirt. After calculating that I had enough, I pleated the fabric to a waistband over the course of 1 weekend. As well, I "guarded" the hem of Cassy's dress with leftover purple velvet, that would get wider as she got taller. I also made the waist bigger than she was currently. I then made some knife pleats in the front next to the cartridge pleats so that it would grow with her waist. When I placed the skirt on her for a fitting, the pleats did not sit on her waist very well. It needed a bit of support, so I made a small snake-like bumroll. Very tiny. I didn't want it to tie in the front and show through the skirts, so I used hooks and eyes to attach it to the pleats themselves. It worked really well. The skirt lays and hangs properly, and I don't even have to adjust the bumroll as she grows!
Before I could finish the outfit, I had to attach the bodice to the skirt. But I couldn't do that untill I had the lacing on the bodice completed. I chose to lace the back with open ladder stitches, the same as the tan linen dress. I used black cotton embroidery floss, and made some simple twisted cord out of the same floss for the ties. Once the lacing was complete, I fit the bodice and skirt on Cassy and marked out where they would join. At first, I was going to sew the bodice to the skirt, but I realized that wouldn't work with the cartridge pleats, so I decided to finish the bodice as a separate piece, and then "hook and eye" it to the skirt waist-band. I was pleased with the results; the front waist did not fall down where Cassy would trip on it, and the weight of the skirts kept the bodice smooth.
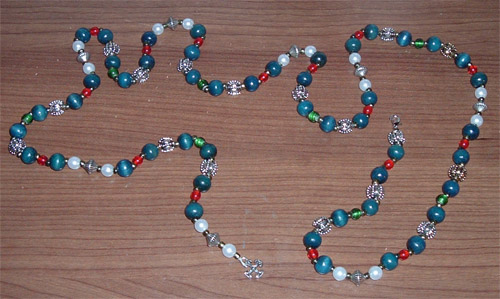 I finished up the dress by attaching the purple skirt band and hand hemming it to Cassy's current height. I then decided to hand stitch the top half of the completed sleeve to the sleeve head but not the bottom half as it would have proved too complicated for the back lacing when she grew and the sleeve had no give to it. I got some clip-on earrings at a local thrift shop, and some glass pearls at a beadshop. I still have to find a "bobble" for the center of the pearls, but it looks good. I completed the outfit by making a simple girdle-belt out of a bunch of beads I had laying around. I still need to find a proper "bobble" for the end of the girdle, but for now, the belt will do as is.